Building a Climbing Wall
This article is a part of a series titled “The Home Climbing Wall”, designed to guide you through the process of selecting, installing, or building a climbing wall at home. Follow the links at the end of this article to continue learning!
Want an elegant, strong, ready made solution for adults or kids right now? Check out Tree Frog Home Climbing Walls!!

Looking to go a little more DIY? Keep on reading!
This article focuses on building the actual wall, laying out all the climbing wall specific bits of information and know-how that you’ll need to get started. We will discuss some of the important, specific things you'll need to know to build a bouldering wall or climbing wall with confidence. We will cover the principles of mounting to an existing wall, selecting the proper fasteners for mounting a rock wall to an existing structure, choosing the right materials for the climbing wall itself, how to attach climbing holds to the wall, and finally go over a few options for finishing your climbing wall.
This is part three of a five-part series on the home climbing wall. At the end of this article, you can find links to the rest of the series so you can continue learning.
The Essentials

Even the simplest home climbing wall designs will require a basic skill set including measuring, cutting, drilling, and installing simple fasteners. In today's world, there's no reason to use these tools without understanding proper techniques and safety protocols. There are many great resources out there, we recommend building up those skills with some simple projects before you dive into anything too complex. From this point forward we are going to assume you have foundational knowledge and skills with the basic tools and techniques of simple carpentry.
Mounting to an Existing Wall or Ceiling
What kind of wall do I have?
Before we start attaching big, heavy things to your home, we need to have a good understanding of what we're working with in terms of construction. It’s very important that you find out exactly how the wall or ceiling you plan to build around is constructed. Most fall into three categories: Lumber studs, metal studs, and concrete or masonry walls.
Drywall over Lumber Stud

This is the most common method employed in the US and the easiest type of structure to attach a climbing wall to. These studs are most commonly 2x4 dimensional lumber, meaning the actual dimensions of that piece of wood are 1.5 x 2.5” (if this is news to you, you’re not alone), with the 1.5” section facing the drywall. This means you have a 1.5” window to hit that stud, and with certain fasteners, it is more or less critical to be on center. More on this in the fastener section.
Studs in nearly all modern homes are spaced 16” apart center to center, and even very old homes generally follow this standard. You will find variations of up to 24” spacing, but these are typically in older homes. These standard spacings will vary to accommodate doorways, windows, etc. and may not always line up perfectly with the end of a wall.
Drywall over Metal Stud
This is relatively rare in US residential housing, but it is used. You’ll encounter it more frequently in commercial or office buildings. Unfortunately, metal studs are not very good at supporting lateral loads and just won’t cut it for use as direct support for a climbing wall unless significantly reinforced.
Test: The simplest way is to use a metal detector. You might think “Yeah, like I have one of those laying around”, but chances are you’re using one to read this article. Yep, your smartphone! Check the app store for a metal detector app. There are lots of free options (we like this one: Metal Detector ). Drywall is attached to wooden studs using steel screws. These will show up with the metal detector, but only intermittently. A steel stud will be detected the entire length of the member, from top to bottom.
If you don’t have access to a metal detector, a strong neodymium magnet will work as well in the same way. Some higher end stud finders also have the ability to distinguish between metal and wooden studs.
The ultimate test is to determine the stud location and drill a small hole. If you get metal shavings, it’s a steel stud.
Concrete or Masonry Walls
In the US this is most commonly found in basements, but around the world it is commonly used for the majority of the walls of the structures. These walls can provide a very solid foundation for a climbing wall, but require pre-drilled holes (often requiring a hammer drill) and more expensive fasteners. We will discuss this in more depth in the Fasteners section.
Ceiling Supports
The supports behind your ceiling are called joists. These are typically 2x10 or 2x12 dimensional lumber studs, or I-joists. I-joists are a wood products similar in function to a steel I-beam, which are constructed using two 2x3’s connected with a “web” of OSB. This means you will have either a 1.5” window (2x10’s) or a 2.5” window (I-joists) to hit your stud.
How much weight can my wall hold?
This doesn’t have a simple answer. The weight of the load, how much it moves, the direction of the force, the geometry of your wall, and how spread out it is are all factors. If you’re planning something elaborate and aren’t confident figuring this out you should consult a professional. If you're really worried about it, you can always build a freestanding climbing structure.
The goal here is to distribute the load as much as possible. The more studs you engage in supporting your climbing wall the better. You should never rely on a single stud, even the simplest bouldering wall should connect to at least two. If your design incorporates connections to ceiling joists this is especially important, one joist is never enough. When mounting to concrete or masonry never rely on a single mounting point, spread it out.
Here is a great place to incorporate what is called a “stringer”. A stringer is a strong, stiff crossmember (such as a 2x4) that spans and connects to several studs, allowing you to connect your structure to this crossmember. It helps distribute the force. This technique is extremely useful for our applications, and is recommended on almost anything that is mounted to the ceiling.
Mounting a Climbing Wall to Drywall over Lumber Studs
Once you have a design that distributes the load evenly over your wall, we are ready to discuss the connection itself.
First, you will need to find the studs and map their layout. Stud Finders usually work great, but using a metal detector or magnet to find the drywall screws as discussed above is often more reliable. There are lots of great resources out there that go into more depth on this, here is one that covers the basics [link].
Now we need to determine what kind of screws or fasteners to use for climbing wall. For almost all connections to lumber studs, we recommend using #10 self-drilling wood screws (like these: Home Depot SPAX #10 Wood Screws) that penetrate at least 1” into the stud. Drywall is typically ½” thick, so if you are screwing a 1.5” thick 2x4 to the wall the screw needs to be at least 3 inches long, preferably longer. One of these screws can typically withstand pullout forces (along the axis of the screw) from 100 to 150 lbf per inch of engaged thread, and far more than this when loaded in shear (perpendicular to the axis of the screw). Here is a useful chart: Screw Pullout Strengths
An alternative here is lag screws. If your design is such that the force is pulling straight out of the wall or ceiling and is potentially high, lag screws may be your best option. A ⅜” lag screw can typically withstand pullout forces from 300 to 400 lbs per inch of engaged thread. It is very important to note that a lag screw needs to have a hole pre-drilled into the stud, and it is critical that this hole be very close to the center of the stud. They leave bigger holes on your wall when you are done and are just more of a pain to work with.
If you plan on removing your climbing wall at a future date and don't want to mar your drywall, we recommend attaching adhesive-backed felt strips to the back of any member that contacts the wall. Avoid rubbery weather stripping, as it tends to adhere to the paint over time, and peel it off with it.
Mounting a Climbing Wall to Concrete or Masonry
Concrete walls are super solid and make great supports for a home climbing wall, but they are a little harder to work with.
For light loading, such as a vertical bouldering wall directly against the concrete wall, using Tapcon screws can be a great option. The 3/16” screws are rated for 220-600 lbs in pullout strength [link] per inch of thread engagement. They are relatively easy to use, but still require a pre-drilled hole. We recommend these for most simple applications.
Home Depot - Tapcon Masonry Screws
For very high load applications, a wedge anchor is your best bet. These are what you see connecting the hangers to rock faces on most sport routes you’ve climbed, and are extremely solid. There are a lot of factors for calculating pullout strength, if you're interested here's a good place to start.
Trubolt Wedge Anchor Technical Data
Selecting the right material for your climbing wall surface
This is the part of your wall that you will be interacting with the most, so a little extra money can really make a big difference. It can be tempting to use some cheap OSB or particle board, but you’ll pay for it in splinters and blown out holds down the road. Here are some options to consider:
Baltic Birch

Woodcraft Woodshop - Baltic Birch Plywood 18 mm-3/4" x 30" x 48"
This is the Cadillac of the plywood industry. Strong, consistent, uniform plies laminated with high quality, low toxicity adhesives. The stuff is beautiful and rock solid. It’s a little more pricey, heavy, and more difficult to source locally, but it's the best of the best. You will find it in rock gyms around the world. 18mm thickness is the most commonly used.
A/C Plywood

Home Depot - 0.68 in. x 4 ft. x 8 ft. CMPC A/C Plywood
This is what we recommend for most home walls. It’s a great balance of bang and buck, featuring sanded “visual” surfaces and indoor/outdoor adhesives so you can use it anywhere. It’s also lighter than Baltic Birch, making it a little easier to work with. Readily available, you can pick them up at most Home Depots. Go with the 0.68” thickness for most climbing surfaces. If you anticipate really high loads on small threads (think campus board) you may want to double up.
OSB
Typically you want to avoid this stuff for a highly tactile surface like a climbing wall. It’s not much cheaper than the A/C boards, and the appearance is a little less refined. However, if you happen to have some laying around and intend to finish it with a thick varnish or paint (unfinished will give you splinters), this is a viable option. It is weaker than the two previous options, so you'll need to go thicker, at least a full ¾” if you want adults to climb on the wall, and you will want to space your supports a little closer together. Pay attention to which side you put facing the climber, there is a rough and a smooth side to OSB.
How to attach holds to the climbing wall
Climbing holds are attached to a climbing wall in two ways. They are either bolted on, using a preset “T-nut” in the wall, screwed directly to the wall, or a combination of the two.
Using T-nuts to mount a climbing hold
T-nuts are small, tubular, threaded inserts with a flange on the backside to prevent them from being pulled through the plywood. The standard thread sizing for a climbing wall in the US is 3/8-16”, meaning the bolt used is 3/8" in diameter and has 16 threads per inch. Around the world you will see M10-1.5 bolts being used as well, meaning the bolt is 10mm in diameter and the threads are spaced 1.5mm apart. There are several different variations beyond the thread callout that you need to be aware of when choosing T-nuts.
T-nut Barrel Length
The barrel length is how deep the tubular section, or barrel, of the T-nut, will extend into the plywood. We want the barrel to extend as close to the climbing surface as possible without protruding past it. Keep in mind when tightening these down the plywood may crush slightly, making the barrel extend a little more than expected. This is less of a problem with high-grade plywood such as Baltic Birch, and more pronounced in cheaper grades. Wide flange T-nuts also help reduce this effect (keep reading for more info on these). A good target length to shoot for is 1/8" less than the actual thickness of the plywood sheet.
T-nut Flange Width
The flange is the flat section of the T-nut that sits perpendicular to the axis of the barrel or sits flush with the backside of the plywood panel. Its function is to prevent the T-nut from being pulled through the plywood. Generally speaking, the wider the flange, the smaller the risk of blowouts.
T-nut Fixation Method
The fixation method is the way the T-nuts are fastened to the plywood and the way they resist rotation. These two functions are very important. It can be a major pain when you are setting a route on your wall and one of your T-nuts starts to spin, or even pops straight out the pack of the panel. This means that hole is no longer usable, or you have to take down that section of the wall to access the back and repair it.

Pronged T-Nuts are the easiest to find, cheapest, and simplest to install option, but they are more prone to spin out, popping out the back, and blowout (they rarely come in large flange widths). They are simply hammered into place, but this means if pushed (pretty hard) from the front they can just come right out. If you are building a very simple kids wall and have easy access to the back, or don’t plan on changing routes frequently, these could be an acceptable option.

Screw-in T-Nuts is the recommended option for climbing walls. If you peek behind the bouldering wall at your local gym, some version of these is what you will find. Instead of relying on hammered in prongs, these are fixed using two or three wood screws. They are usually a bit more expensive, harder to find, and take a little longer to install, but they will save you lots of headaches down the road. They have wider flanges, meaning they have more resistance to blowout. The connection points are more secure and further away from the axis of rotation, meaning the risk of spinout is greatly reduced. Finally, using screws instead of simply hammering them in makes them very difficult to push out from the front.
Screw Mount Climbing Holds
Screws are often used to fix holds to the wall when the hold is too thin or too narrow to fit a bolted connection, or when the hold is very large and spin is a big concern. They are also used in addition to a bolted connection to prevent spin, as we will discuss below. It is important that the threads extend all the way to the base of the hold when attaching the hold to a sheet of plywood to ensure maximum thread engagement. Different holds require different sizes of screws, but most small holds and bolted holds are designed to use #6 wood screws.
Choosing the Right Bolt to Mount a Climbing Hold
Virtually all climbing holds and walls in the US use 3/8-16” threading, so this is the thread callout you will need unless you are using a metric wall (very rare in the US). There are some variations beyond this that warrant discussion.
Bolt Length
The bolt needs to extend past the base of the hold far enough to fully engage the threads on the T-nut, but not so far that the unthreaded portion of the bolt will run into the t-nut or the end of the bolt will run into whatever is behind your wall. Each hold is different, and you will need to check the bolt on each hold you pair it with. Seat the bolt in the hold and check that the threads extend at least 3/4” past the base of the hold, and that it does not extend past the threaded portion of the bolt. When buying holds, they will typically offer to include hardware to make sure you get the proper bolt length.
Head Style
The most common head style (virtually the only one you will find in a gym) is called a socket head cap screw. These are the cheapest, most effective option for most applications. You will occasionally run across a hold that is countersunk, requiring a tapered head, but these are rare. You will need to check the hold you plan to use to verify this and make sure you have the proper bolts. Using the wrong one can crack your hold.
Material and Finish
A 3/8-16” bolt is incredibly strong, supporting tensile loads well in excess of 10,000 lbs. Rarely (if ever) are these the failure point, your wall or hold will almost always break before your bolt does. An exception to this would be a bolt severely compromised by corrosion (rust). Another potential issue is shearing off the bolt. This is rare but can happen if the bolt binds with the threads, due to cross-threading or corrosion.
If you plan to have your wall exposed to the elements, especially anything salty, you should consider buying stainless steel bolts. These are more expensive, but they won’t rust.
For most indoor climbing walls, black oxide finished bolt is the industry standard. This is what you will likely find in your local gym. They are inexpensive, mildly corrosion resistant, and do their job very well.

Black Oxide Socket Head Cap Screw
Preventing Spinning Climbing Holds
There’s not much more frustrating than having a climbing hold spin out on you mid-route. This is a common problem with bolted holds, but there are several ways to prevent it.
Properly Tightening the Bolt on a Climbing Hold
First, ensure the hold is properly tightened. Most setting guides recommend upwards of 15 ft-lbs of torque when tightening the bolt on a climbing hold, which works well when you have solid Baltic Birch plywood and wide flange T-nuts. If you're using a more common grade plywood or pronged T-nuts, 10 ft-lbs is about as high as you want to go before running the risk of crushing your plywood.
Screwing a Climbing Hold in Place
If you are still having issues, the next option is to screw the hold in place. Most climbing holds have a hold already placed in it for this purpose, but you can drill your own if needed. Be sure to countersink it if you do, this reduces the risk of cracking your hold and ensures the screw head isn’t protruding. Screwing the hold in place does make an additional, often unsightly hole in your wall. If you prefer to avoid this, keep reading.
Blocking a Climbing Hold in Place
A common technique, especially with big holds, is called blocking. This is bolting a small hold right up against the bigger, spin prone hold. This is a simple, clean, and very effective option you will see employed by setters quite often.
Wedging a Climbing Hold in Place

The last resort here is called wedging. This involves placing something (like a piece of rubber) under the hold as far away from the bolt hole as possible before tightening it down. This creates another point of contact with a high level of friction, helping to resist rotation. It's not the most bomb-proof technique, but if you want to protect your climbing surface from screw holes and you can't block the hold in place, this is worth a try.
T-nut Spacing on a Climbing Wall
There are no set standards when it comes to hole spacing for a general climbing wall, but the tradeoff is cost and effort when building the wall/options when setting routes. Most climbing gym walls have 2-3 holes per square foot. With system walls, there are standards. Most follow the 20cm grid established by the Moon Board. This is a great place to start for any wall, and if you want to increase the density a bit you can put one more hole at the center of each “cell” on the grid.

It can be tempting to just grab a drill and start going at it, but a little time spent here setting up will make for a much nicer, splinter-free result. Use a backer board and make sure your holes are straight. Using a Forstner bit, a spur point spade bit, or a spur point fluted bit will make for much cleaner holes than your standard fluted or twist bit. Use proper technique. It’s monotonous but worth it!
Finishing your climbing wall surface
A climbing wall is not only something you will be touching and interacting with a lot, but it's also very visible. It is worth taking some time to consider how you want to finish it. Here are a few common options.
Raw, Sanded Finish
If this is a campus or training board and you are using a high-grade plywood, the raw wood finish is an excellent way to go. Simple and easy on the fingers, this is the preferred choice of many serious climbers. Just make sure all the corners and edges are nicely sanded and rounded out. This finish is harder to clean and will show off how much you've used your wall, but the wabi sabi / blackbelt approach has its own allure. If you want to add a little panache, you may even consider a wood stain (without varnish/sealer). Just make sure you let it cure properly before using it or you’ll get some interesting colored fingers.
Sealed Finish
If your rock wall will be going outdoors, you need to think about protecting it. Polyurethane varnish is a great option here but will result in a slick surface that may not be great for smearing. What many people do is mix in a small amount of fine grit sand. A little experimentation with the sand/varnish ratio can get you the texture you are looking for. Another option here is to use a textured exterior grade paint, such as Behr Premium Textured Deckover. This is highly abrasive, making it hard on skin and clothing, but it is produced a very grippy surface.
Painted Finish
Many people choose to paint their climbing walls. This is a great option, providing protection for your panels along with the ability to really customize your creation. Make it match the room, mimic real rock, or paint a mural… It’s your call. You do want to select something highly durable, we recommend using an epoxy paint with a primer base if you really want it to last. You can add sand to produce texture just like we mentioned in the previous section.
Building a safe climbing wall
Wood has imperfections. There might be knots, cracks, or warping in your studs that make one fastener connection weaker than it should be. In engineering, we use a term called “Factor of Safety”, which is essentially how strong something is theoretically calculated to be compared to how strong it theoretically needs to be. For example, if a fastener is rated to hold 100 lbs, and it needs to support a 50 lbs load, it would have a factor of safety of 2 (100 lbs / 50 lbs). For a climbing wall, a factor of safety of 2-3 would be appropriate.
Redundancy, or building in backups, is also a very good habit to develop when building a critical system. It is seen all over rock climbing, for example, the use of two bolted chains at the top of most sport routes. The odds of one failing are low, but both failing simultaneously is very, very low. The same applies here. Using two adequately rated screws is safer than using one really big one for this reason. One screw can hit a knot or void, using two screws increases the probability of making a solid connection dramatically.
Please note, we have provided some very useful guidelines and information here, but we cannot take any responsibility for your build. Each home is unique, and it is your responsibility to ensure that the home structure is fit for the application and that any structure you build is sound. If you have any concerns, we highly recommend consulting a professional.
If you’ve got experience with basic carpentry skills but need a little guidance when it comes to design, our next article "The Climbing Wall Design Vault" is for you.
You may be interested in:
Tree Frog Home Climbing Walls

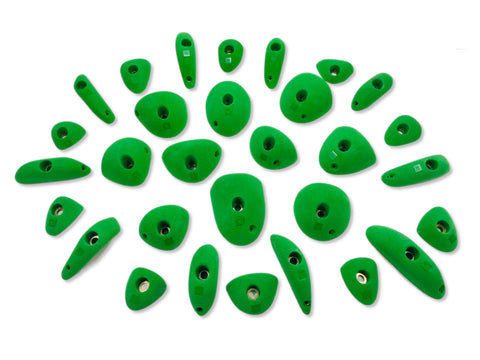
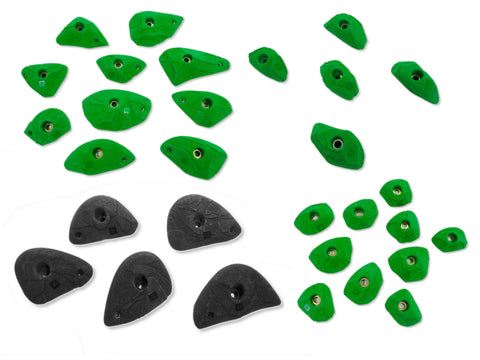
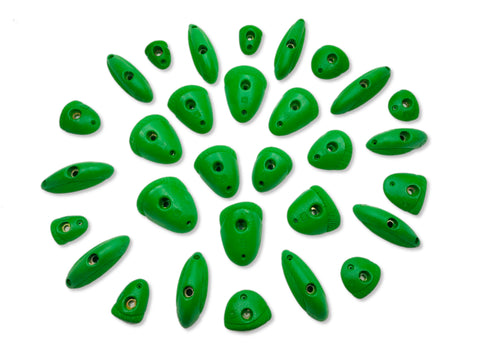
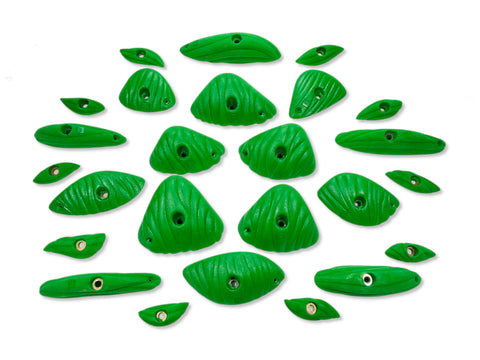
Climbing Holds

Climbing Mats

Hardware

Keep learning with the rest of our Home Climbing Wall series!
The Home Climbing Wall: Where do I start?
Taking a step back to make sure you know what you need to know to start on the right foot.
Choosing the Right Home Climbing Wall
An exploration of different types of home climbing walls and where they shine.
Building a Climbing Wall
Detailed information on how to build a climbing wall that is rock solid. Methods, materials, and wisdom from the esoteric world of home rock wall building.
The Climbing Wall Design Vault
A collection of ready to go design packages for home bouldering walls/home rock climbing walls/home training walls. We include schematics, shopping lists, and detailed build instructions to make building a rock climbing wall go as smoothly as possible.
Build vs Buy
A look at some available options for purchasing home rock climbing wall products, and reasons one may be better for you than another.